
1. Open your web browser (Microsoft Edge, Chrome, Firefox).
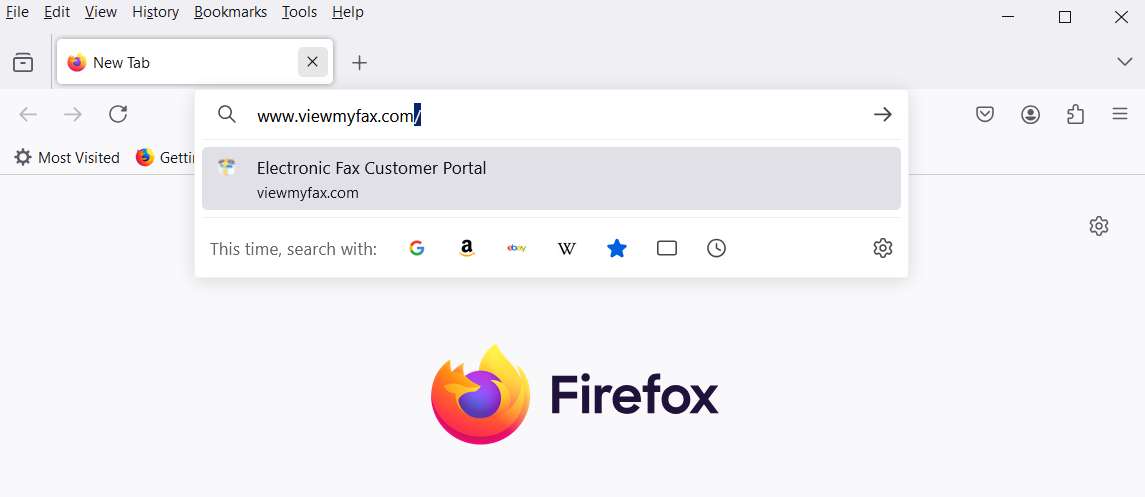
2. Type, www.viewmyfax.com, in the top bar of your browser.
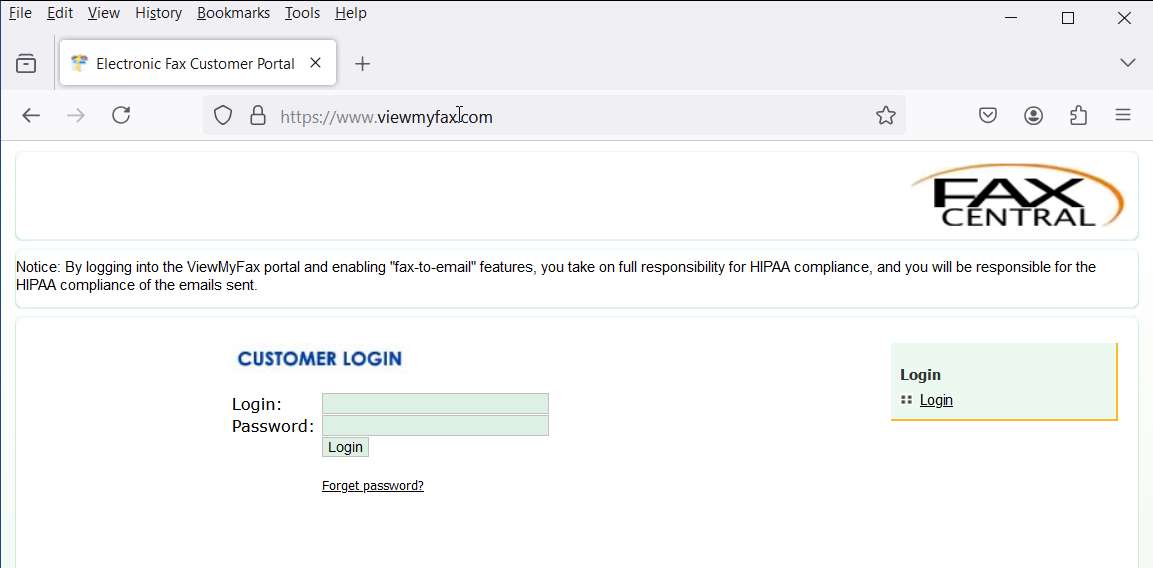
 3. Enter your username and password under 'CUSTOMER LOGIN' and click 'Login.'
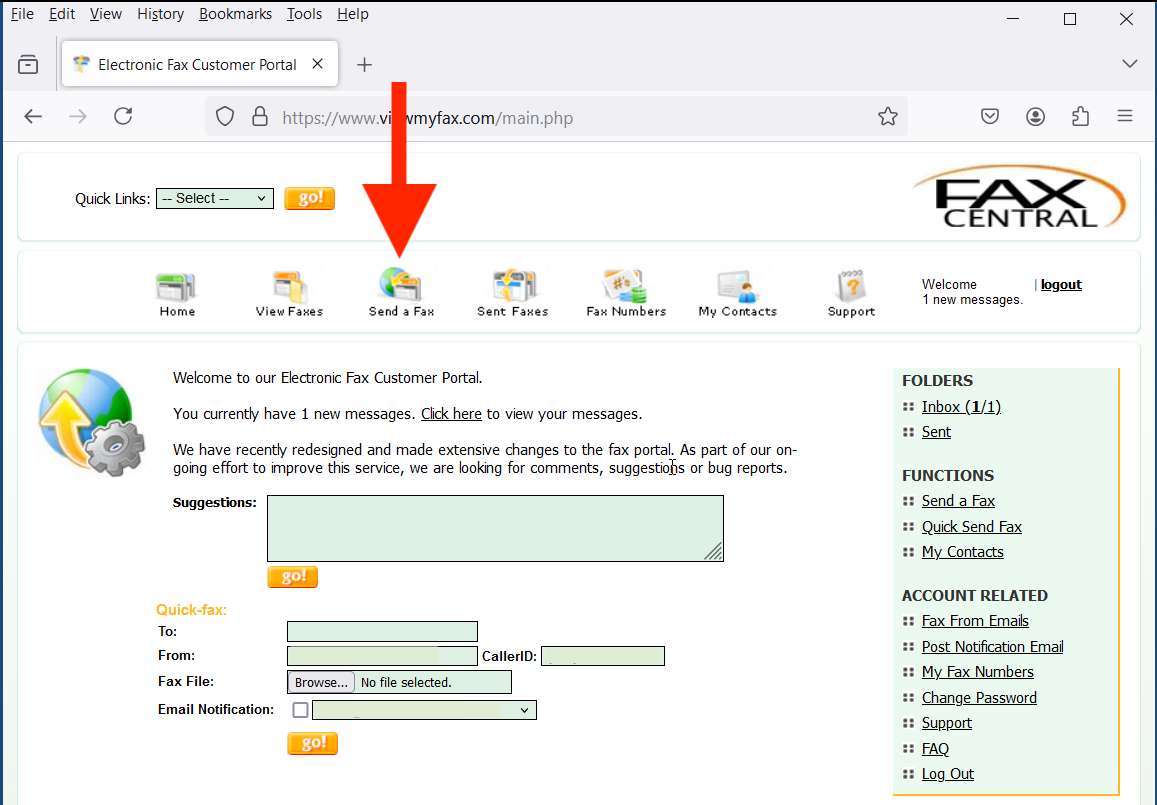
 4. From the row of icons, click on 'Send a Fax.'
 5. Type the 10-digit number of your fax recipient.
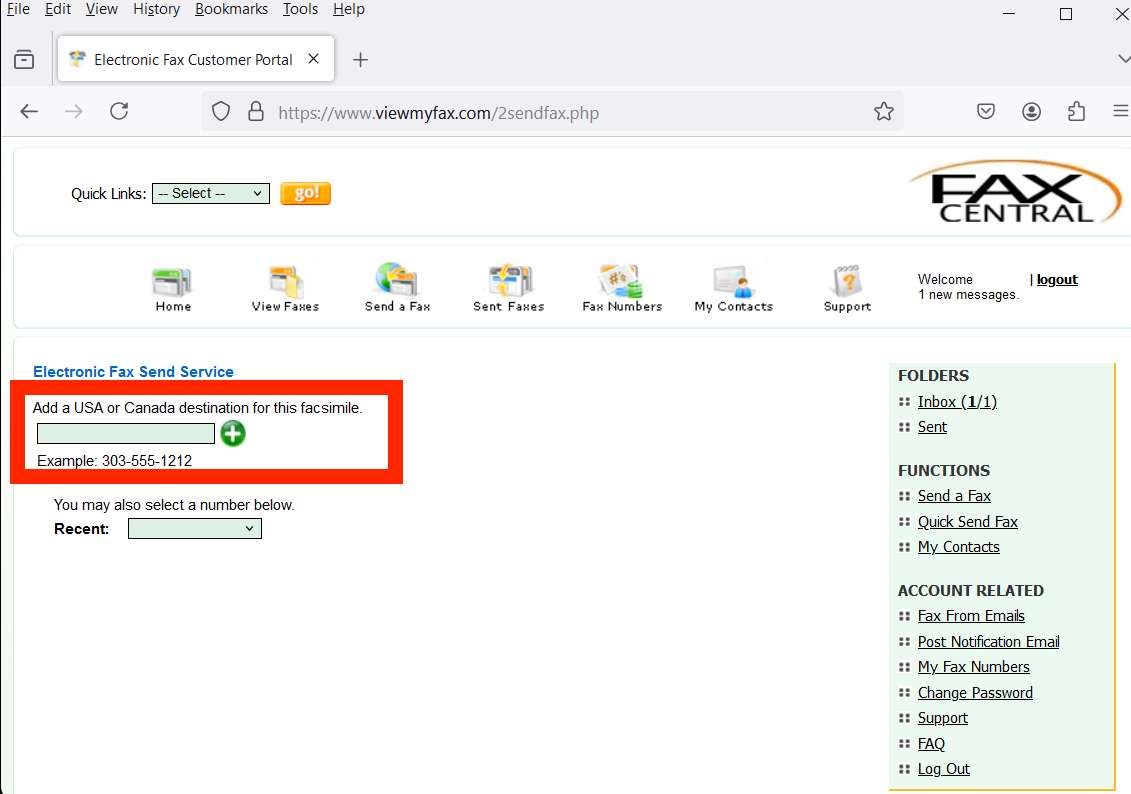
6. Click on the green plus symbol to add the number. To add multiple recipients, type each number then click the plus symbol to add it to the list.
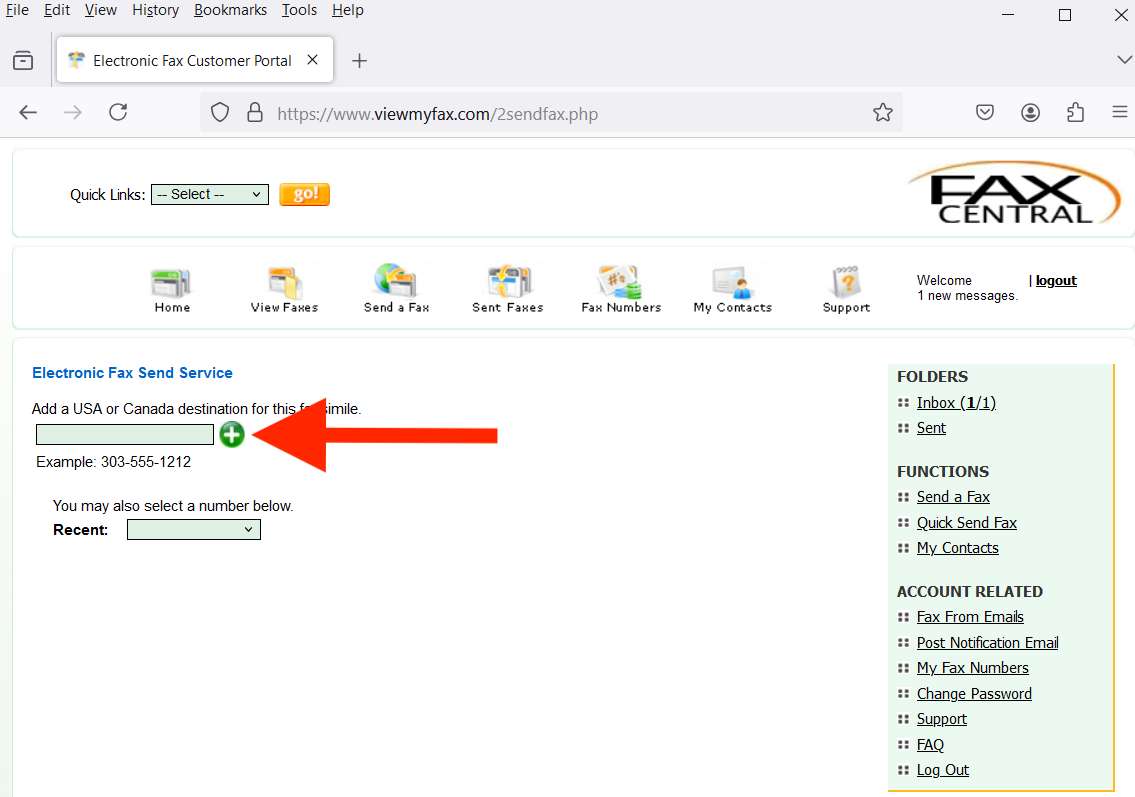
7. When finished entering in fax numbers, click 'Continue.'
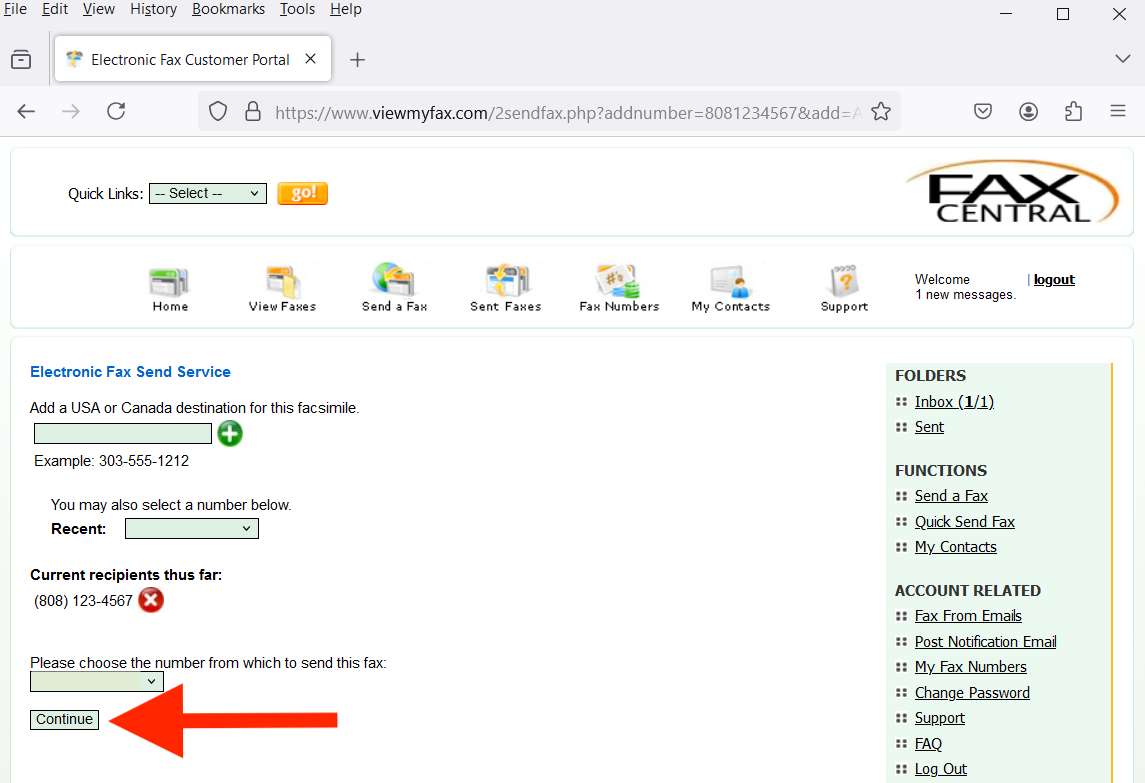
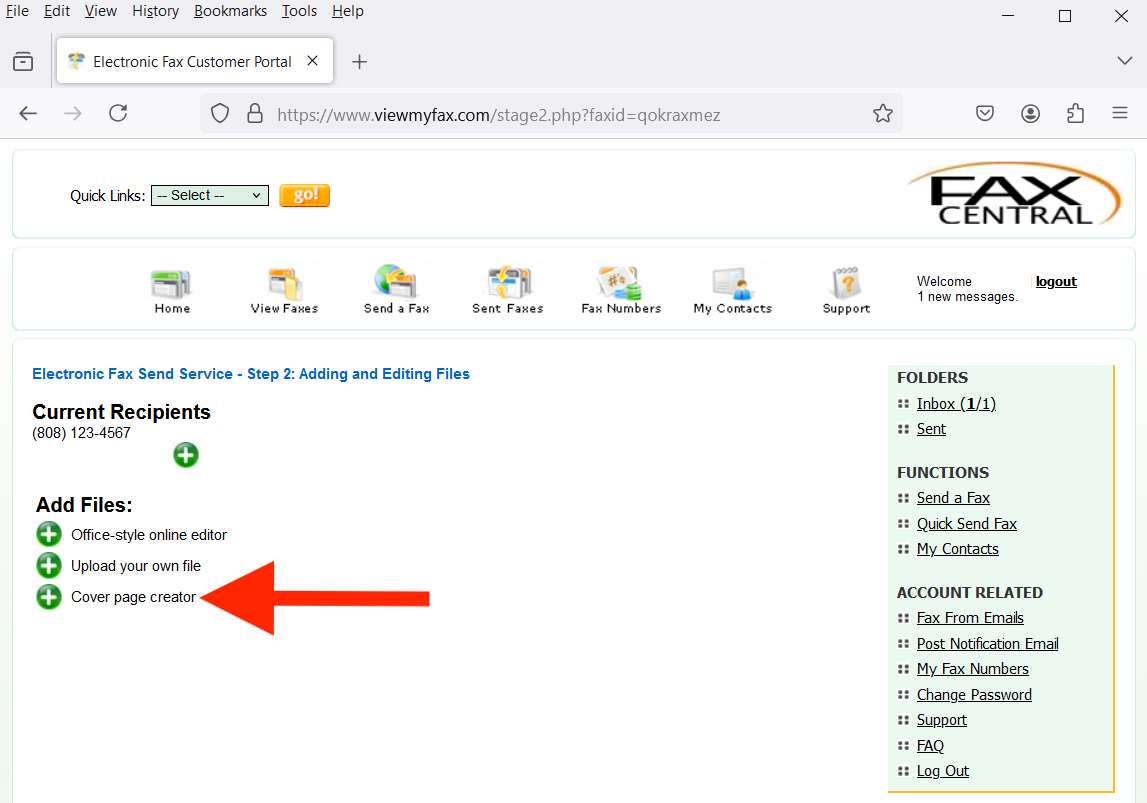
8. Click on 'Cover page creator' under the heading 'Add Files.'
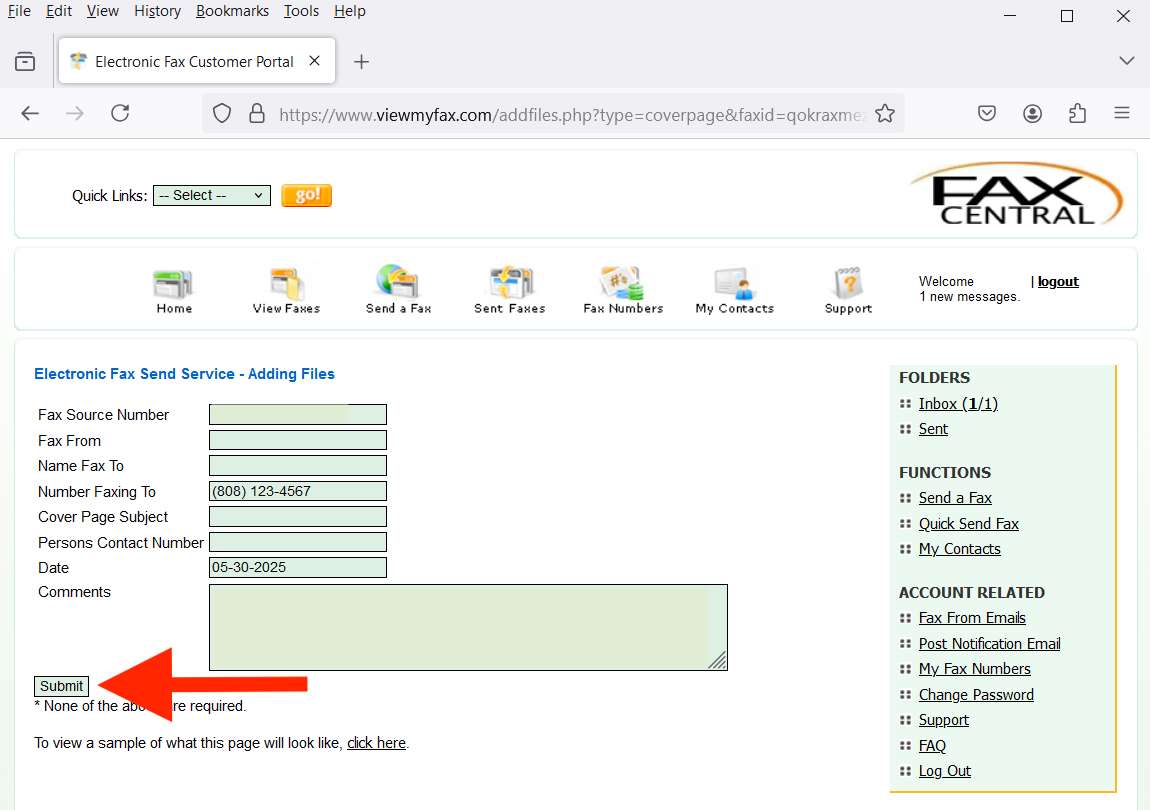
 9. Fill in the empty fields, then click 'Submit.'
--NOTE: Do not input any protected health information in the Cover Page. A Cover Page is required by HIPAA and recommended for any Personally Identifiable Information.
10. Click on 'Upload your own file' under the heading 'Add Files.'
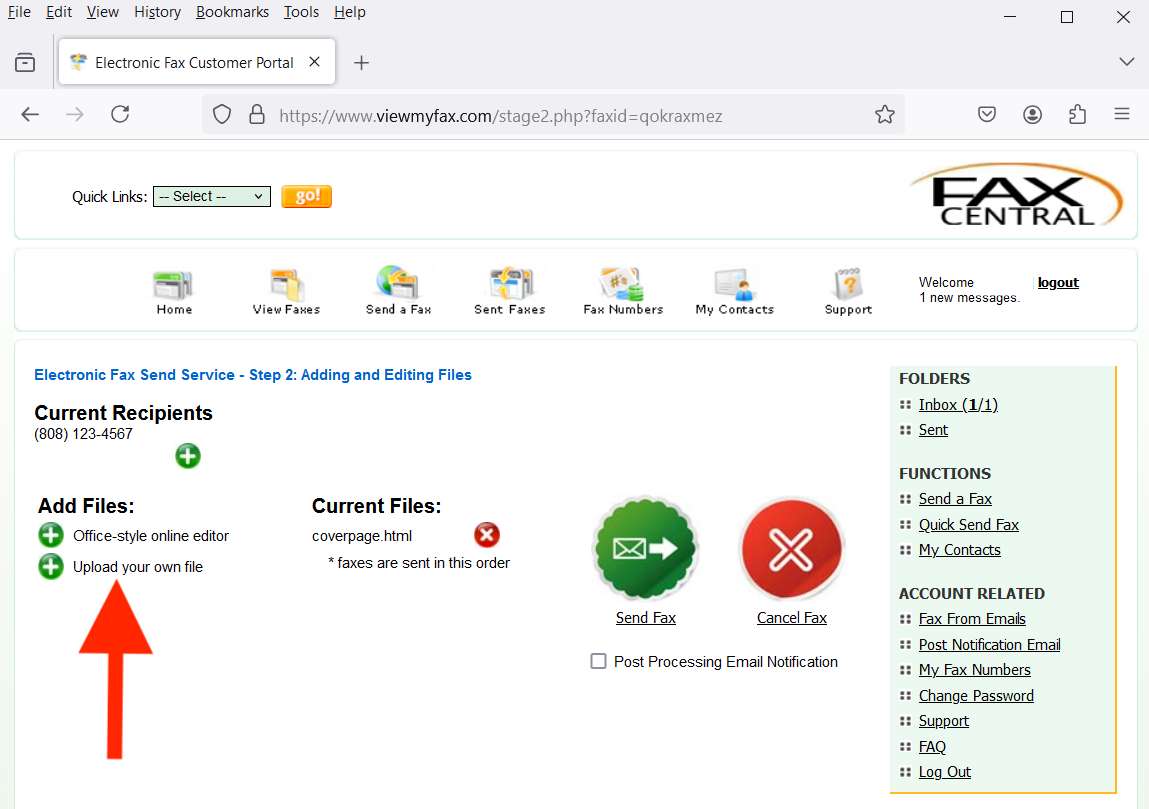
11. Click 'Browse...' to locate the file to be faxed.
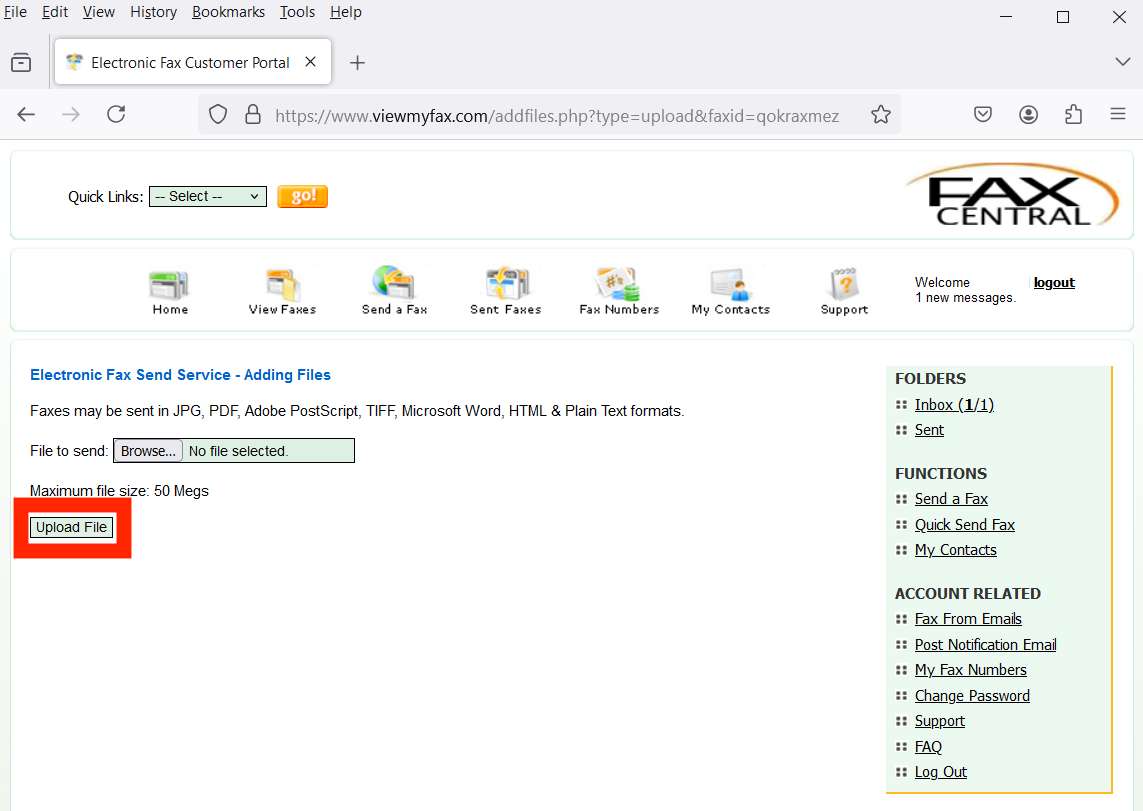
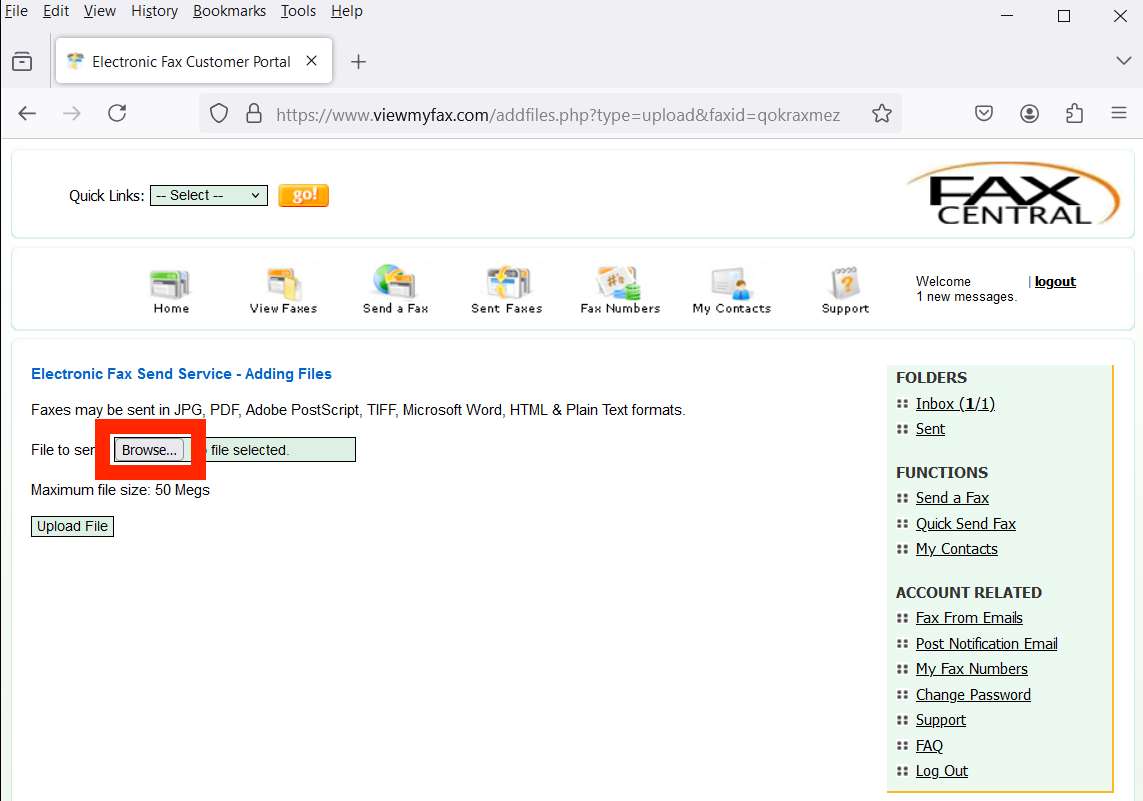 12. When the file is selected and loaded it will show up next to the 'Browse...' button. You can continue to add documents up to a combined total of 50 MB. When you are finished adding documents click on the 'Upload File' button.
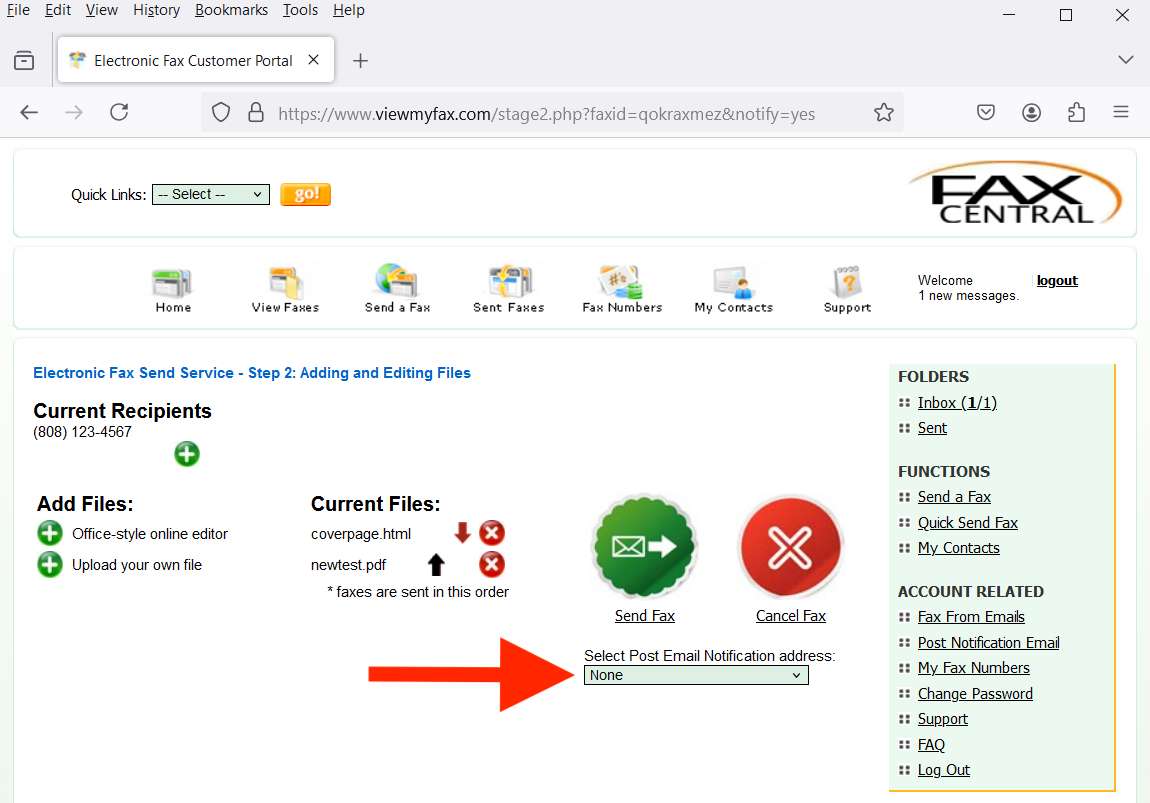
13. This screen shows a summary of what is being sent. If everything is in order, first click the little check box under the big, green 'Send Fax' button to receive an email notification of successfully sent fax. Second, click the big green “Send Fax” button to send your fax.
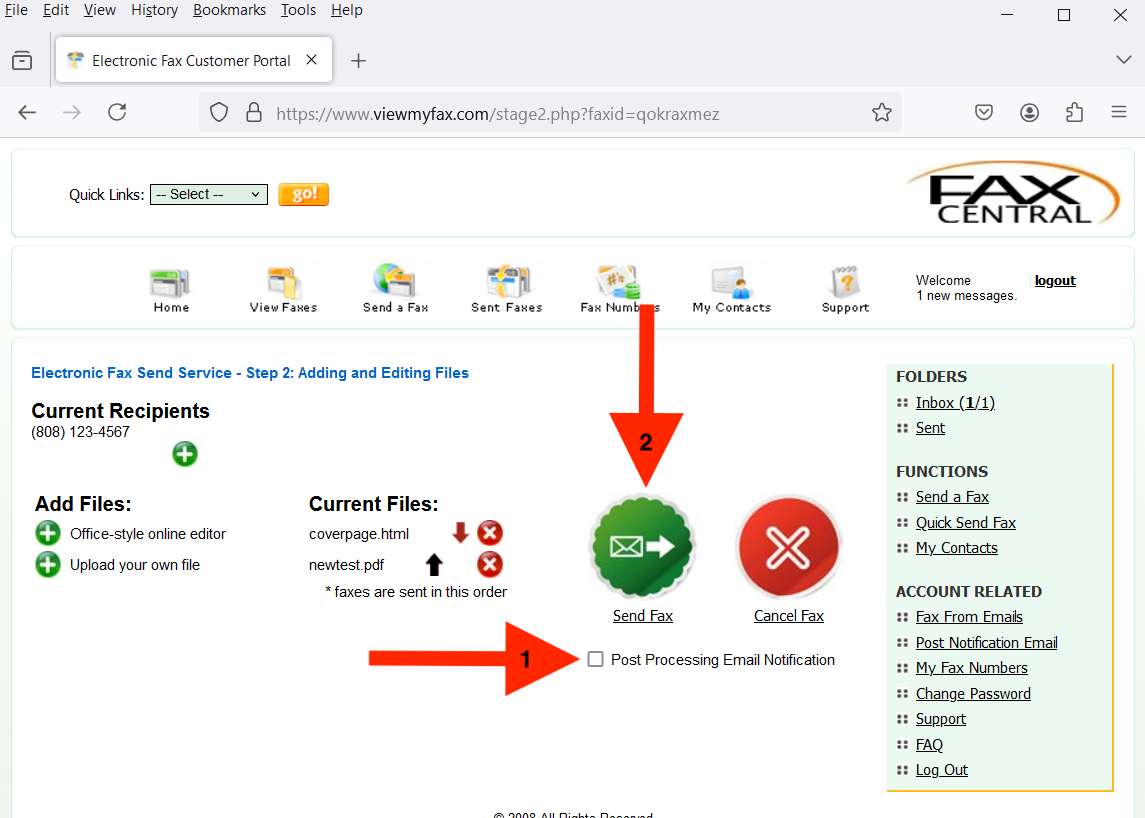
NOTE: If you don't see your email address in the Post Email Notification drop down, you will need to contact our office.
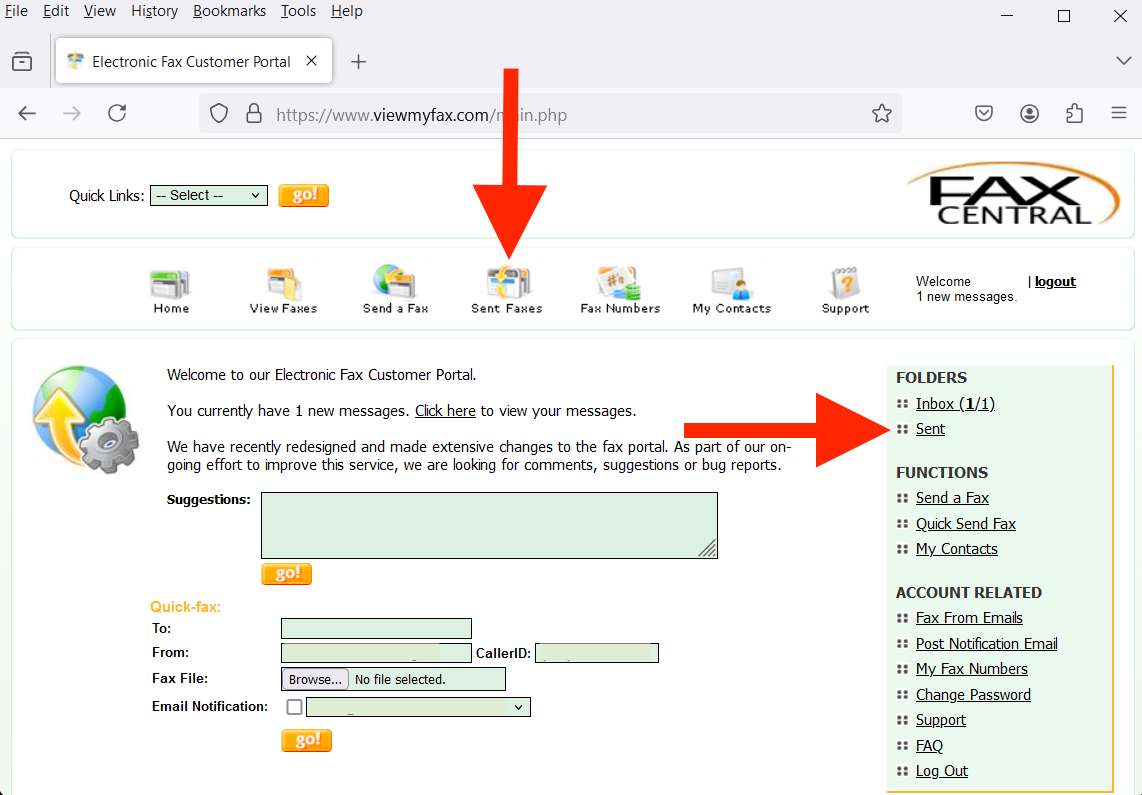
 14. You can see the status of your sent faxes by clicking on the 'Sent Faxes' icon in the top row of icons or by clicking on 'Sent' in the Folder menu on the right side of the screen.
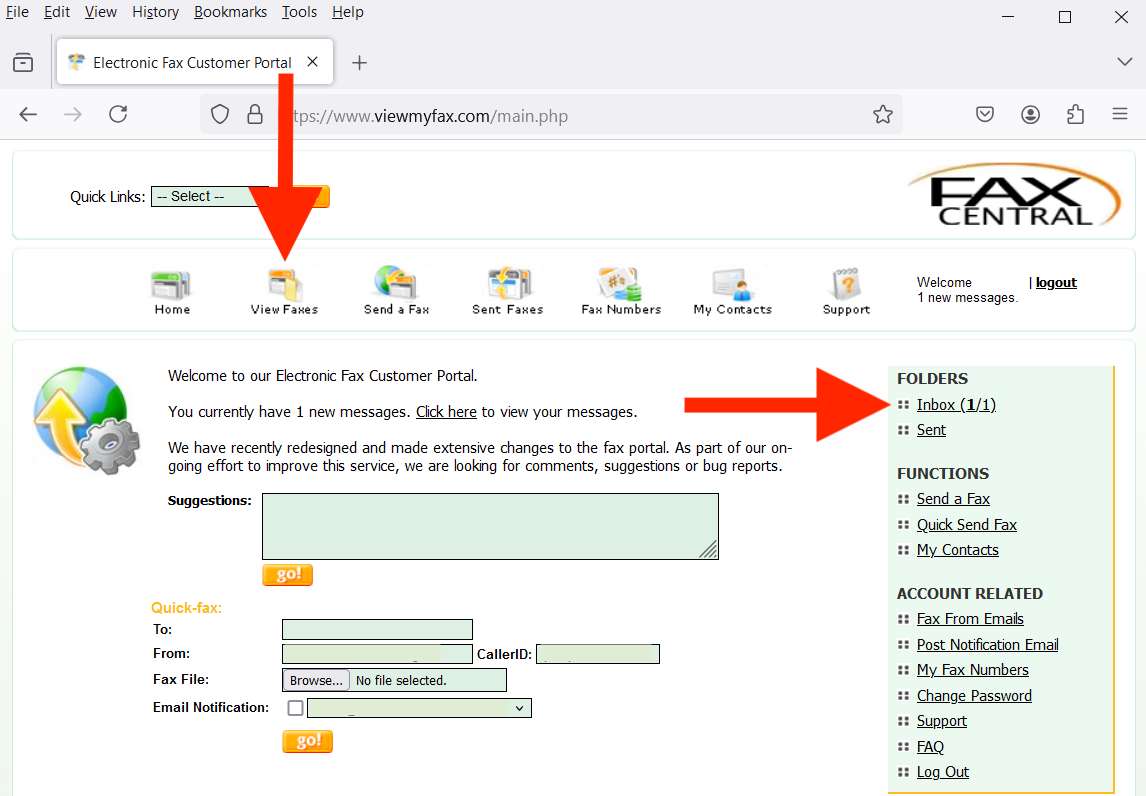
15. You can find your new incoming faxes by clicking on 'View Faxes' icon in the top row of icons or by clicking on 'Inbox' in the Folder menu on the right side of the screen.
 ---
Need Help?
We hope you enjoy your new eFax system.
If you run into issues or have questions, please let us know.
---